How to set up your first brand deal in Poppi Social
A practical walk-through of adding a brand deal for the first time in Poppi Social.
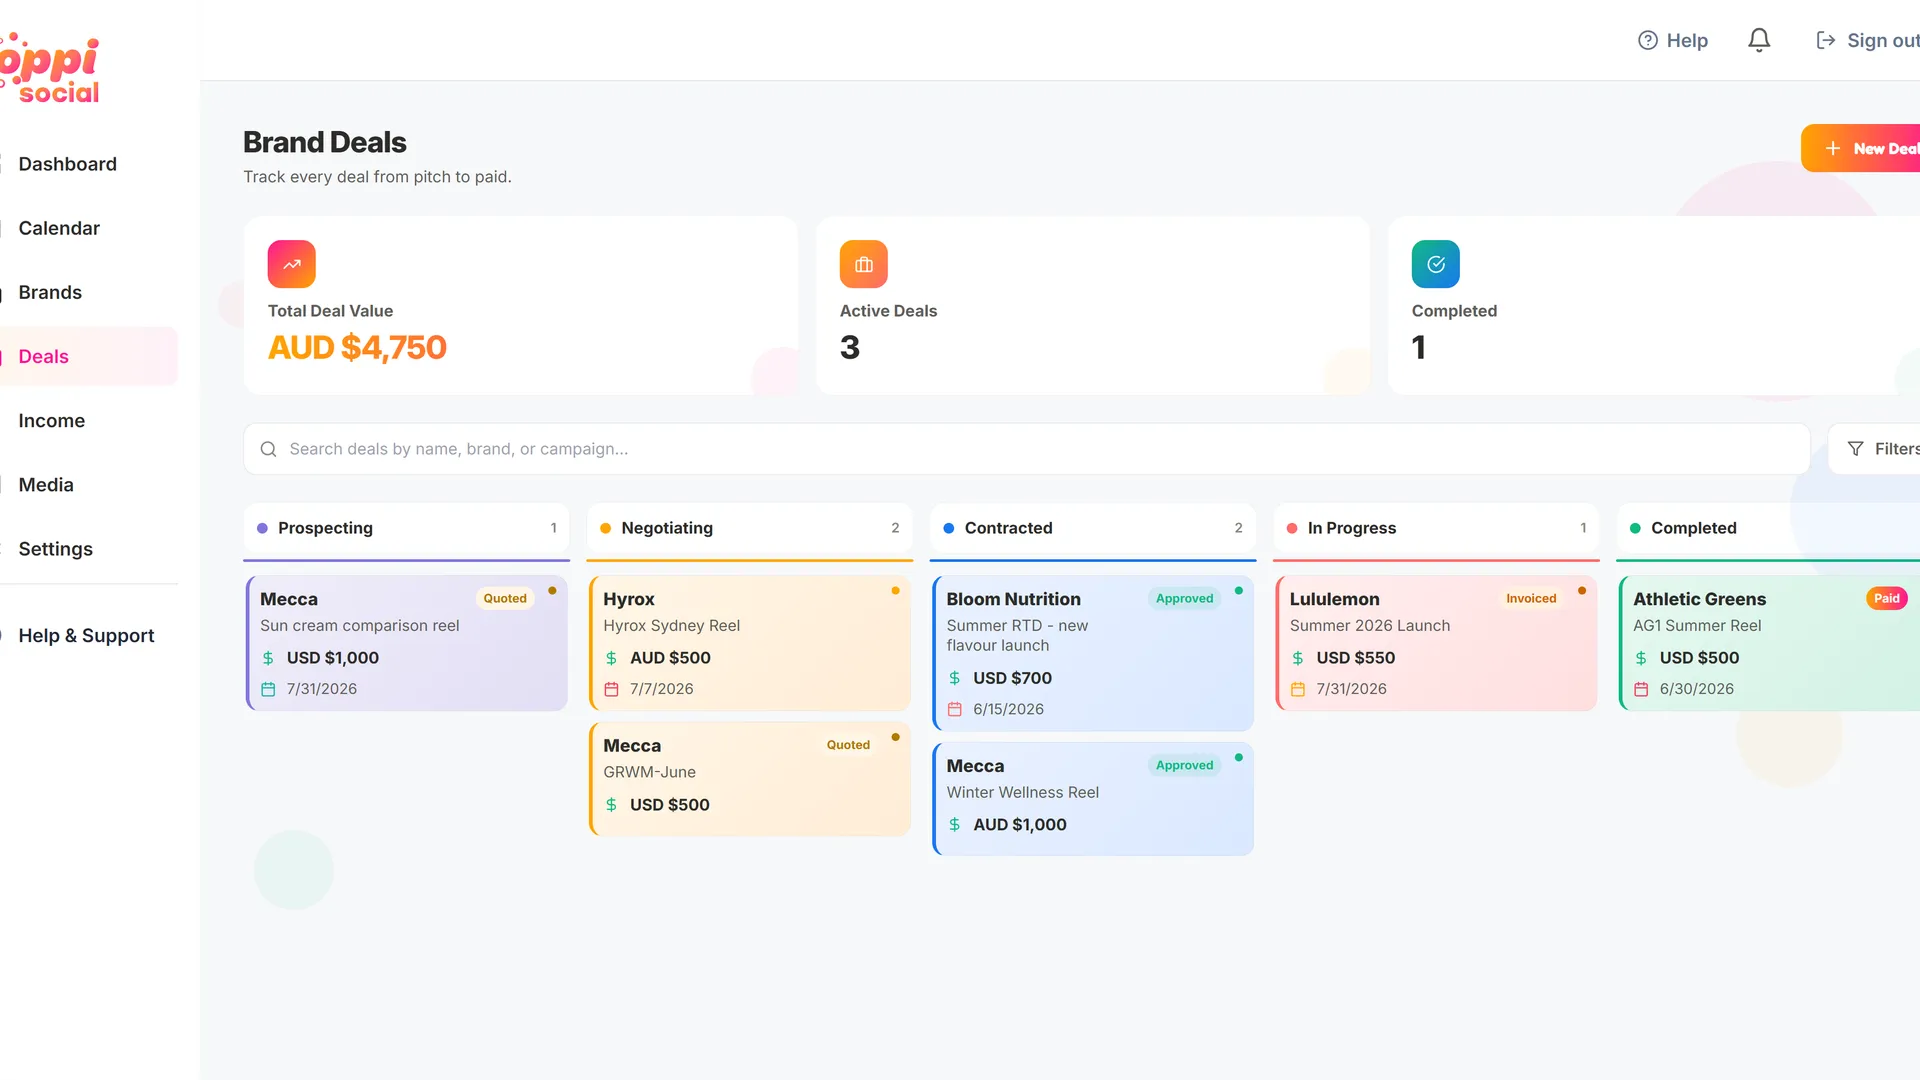
Once you have a brand setup, you can add your first deal to start collaborating with the brand. You can do this from the brand screen below, but most people will add a deal from the deal dashboard above - just click "New Deal" in the top right corner.
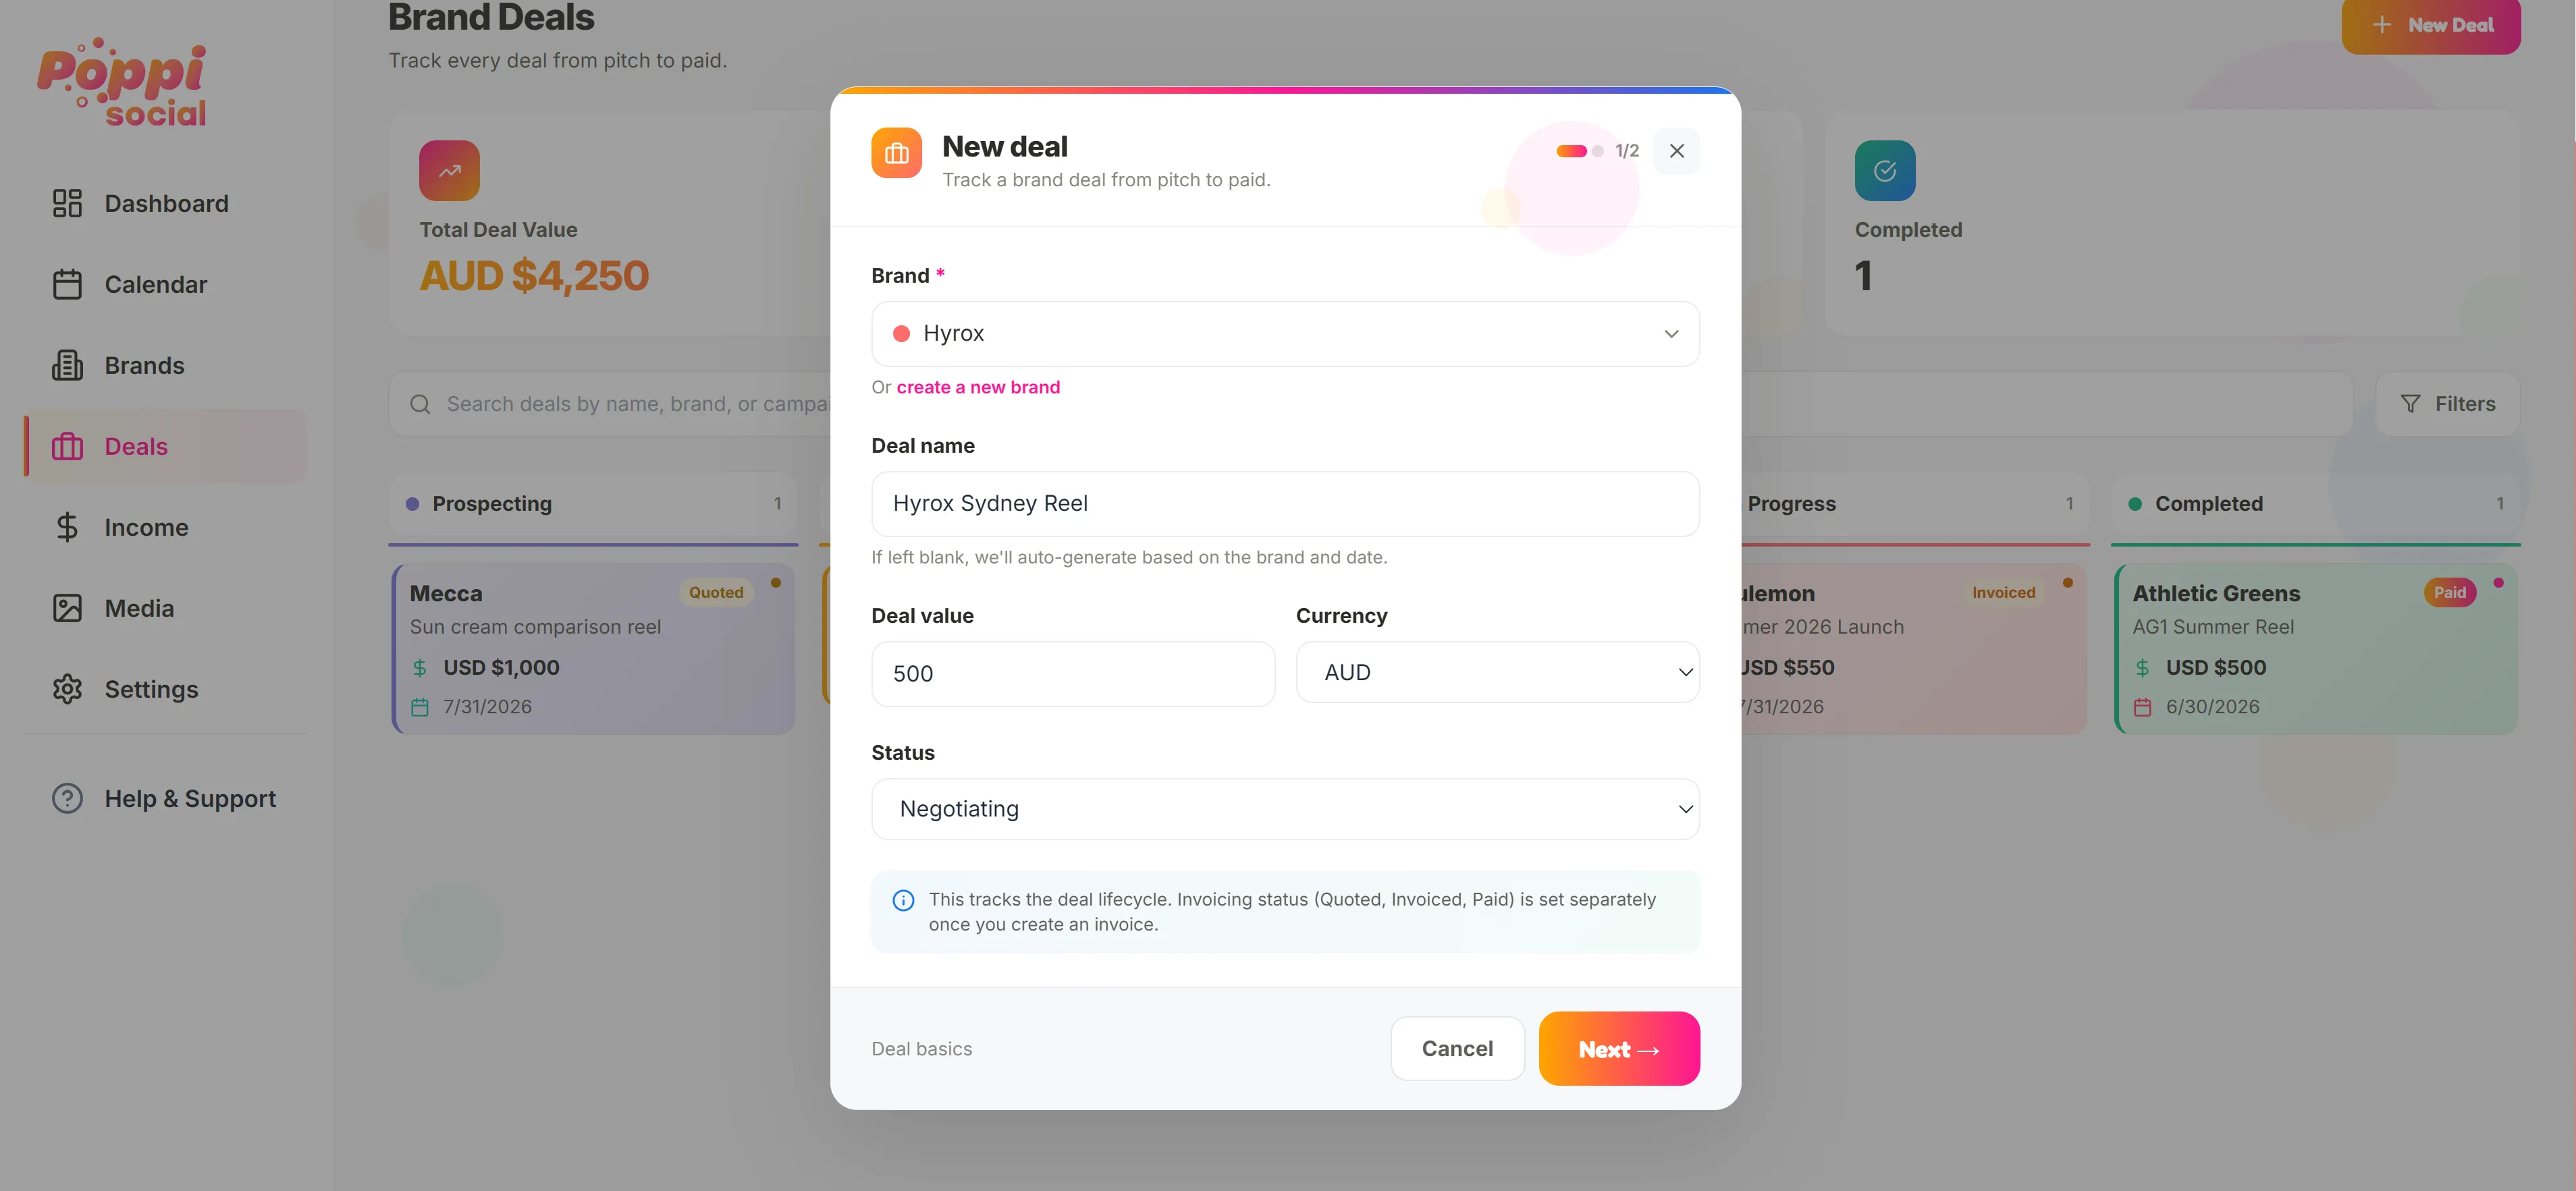
In the "New Deal" form, you can select the brand you want to collaborate with and fill in the details for the deal. You can set the deal value, currency and the status (more on that later)
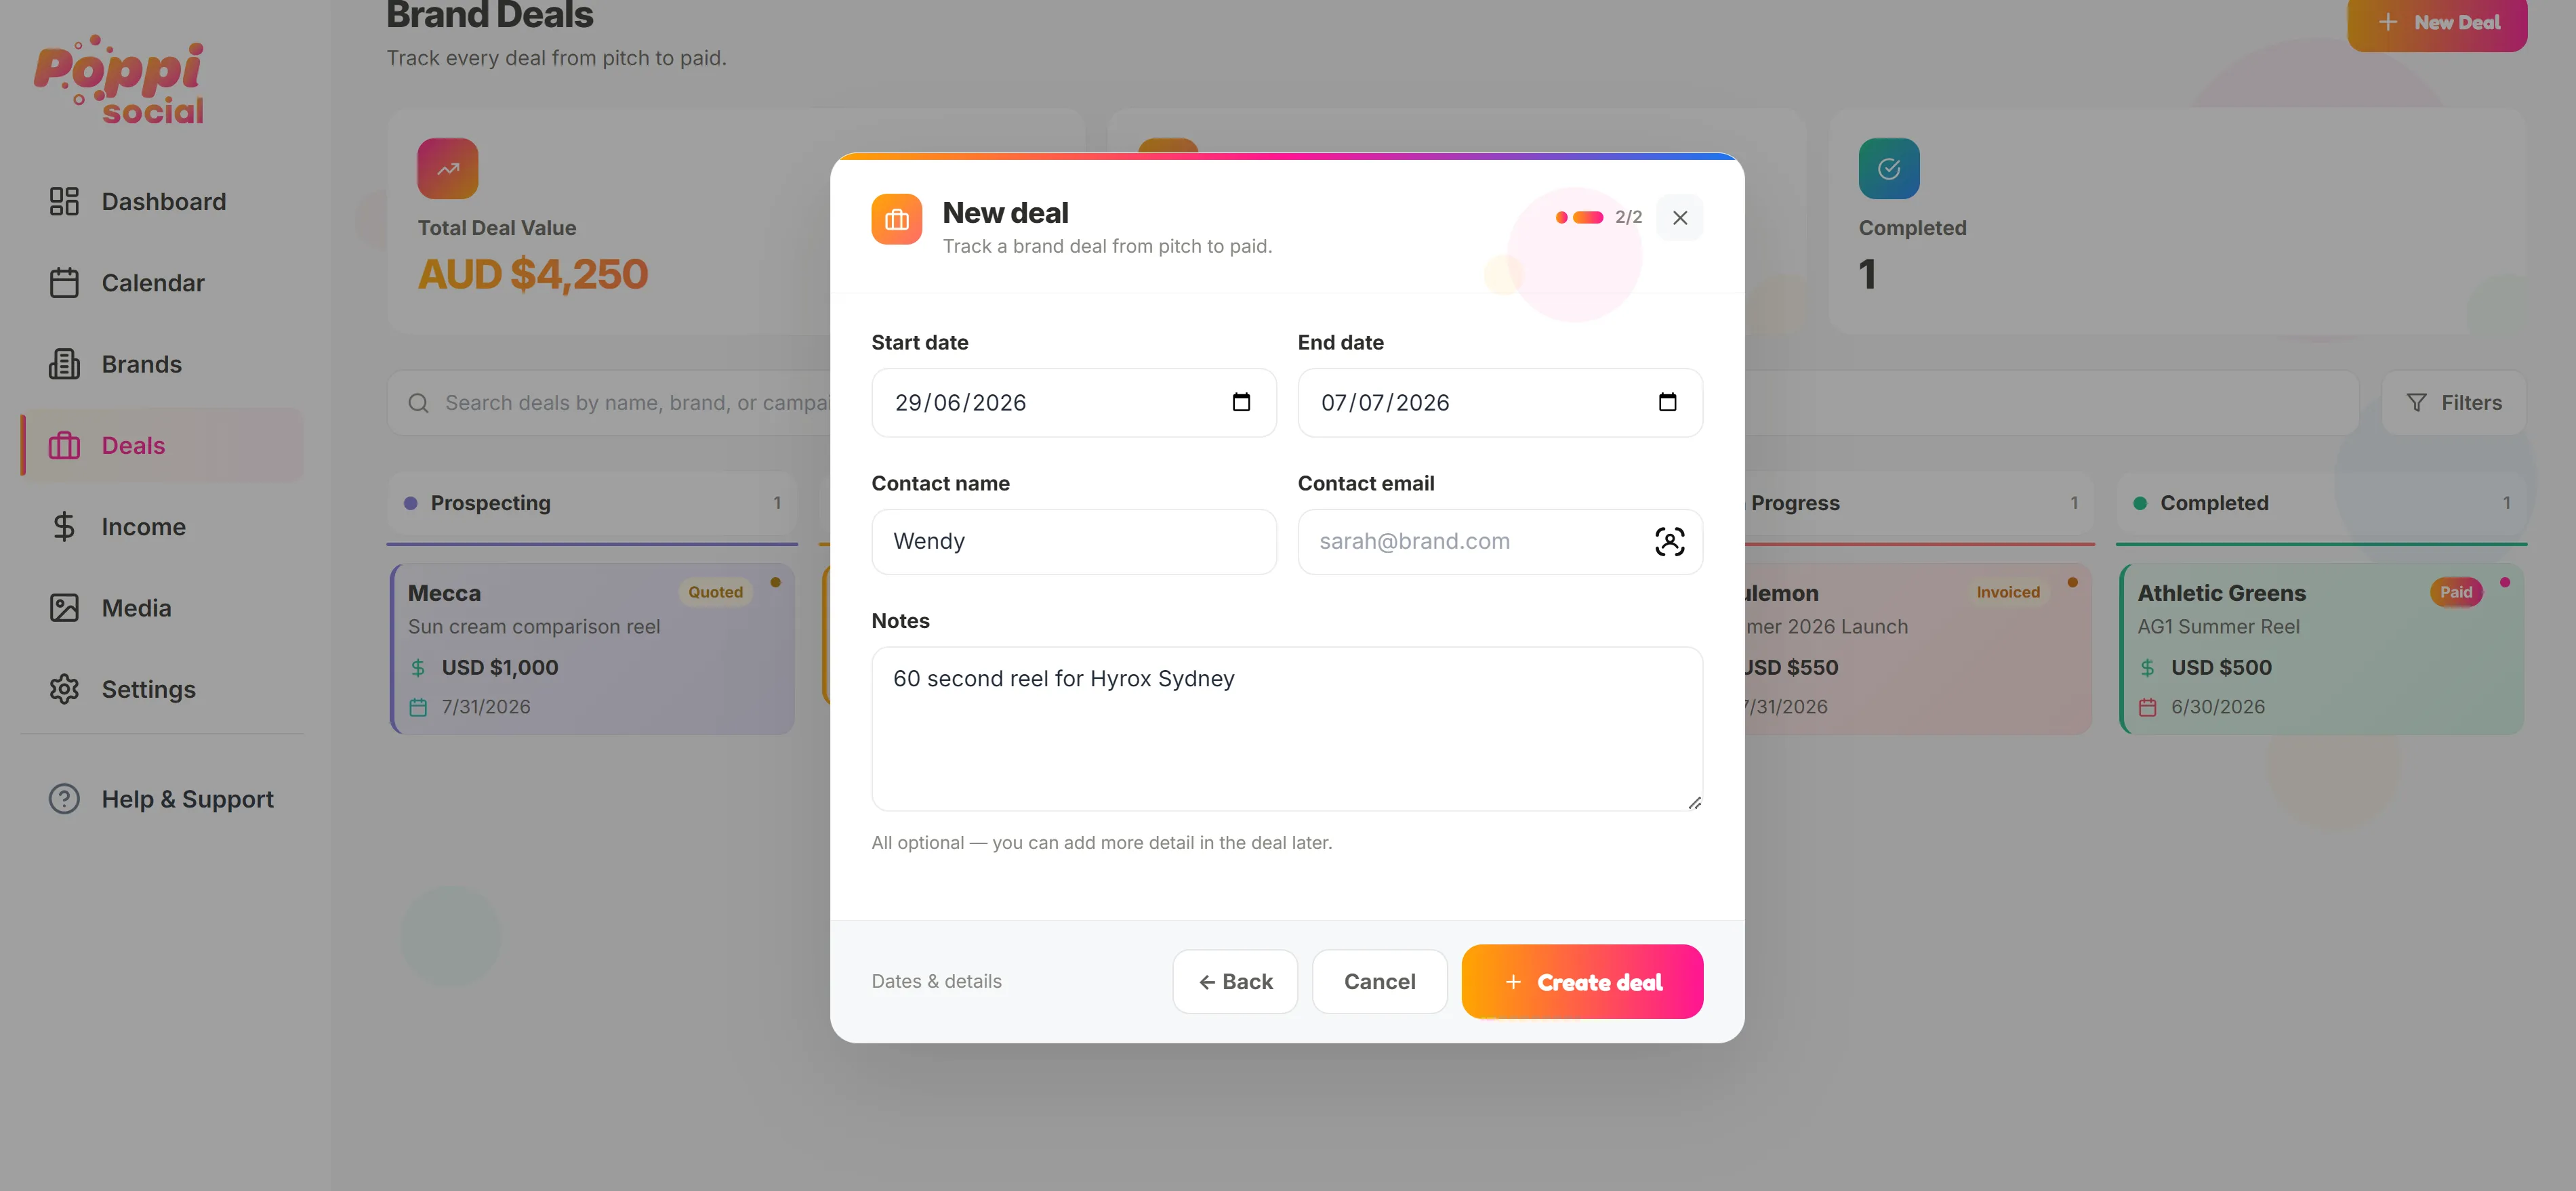
The second page of the new deal form allows you to add more details about the deal, Start and end dates, contact for the deal and any notes. This section is for high level notes the brief will come later. When you are done, hit "Create deal"
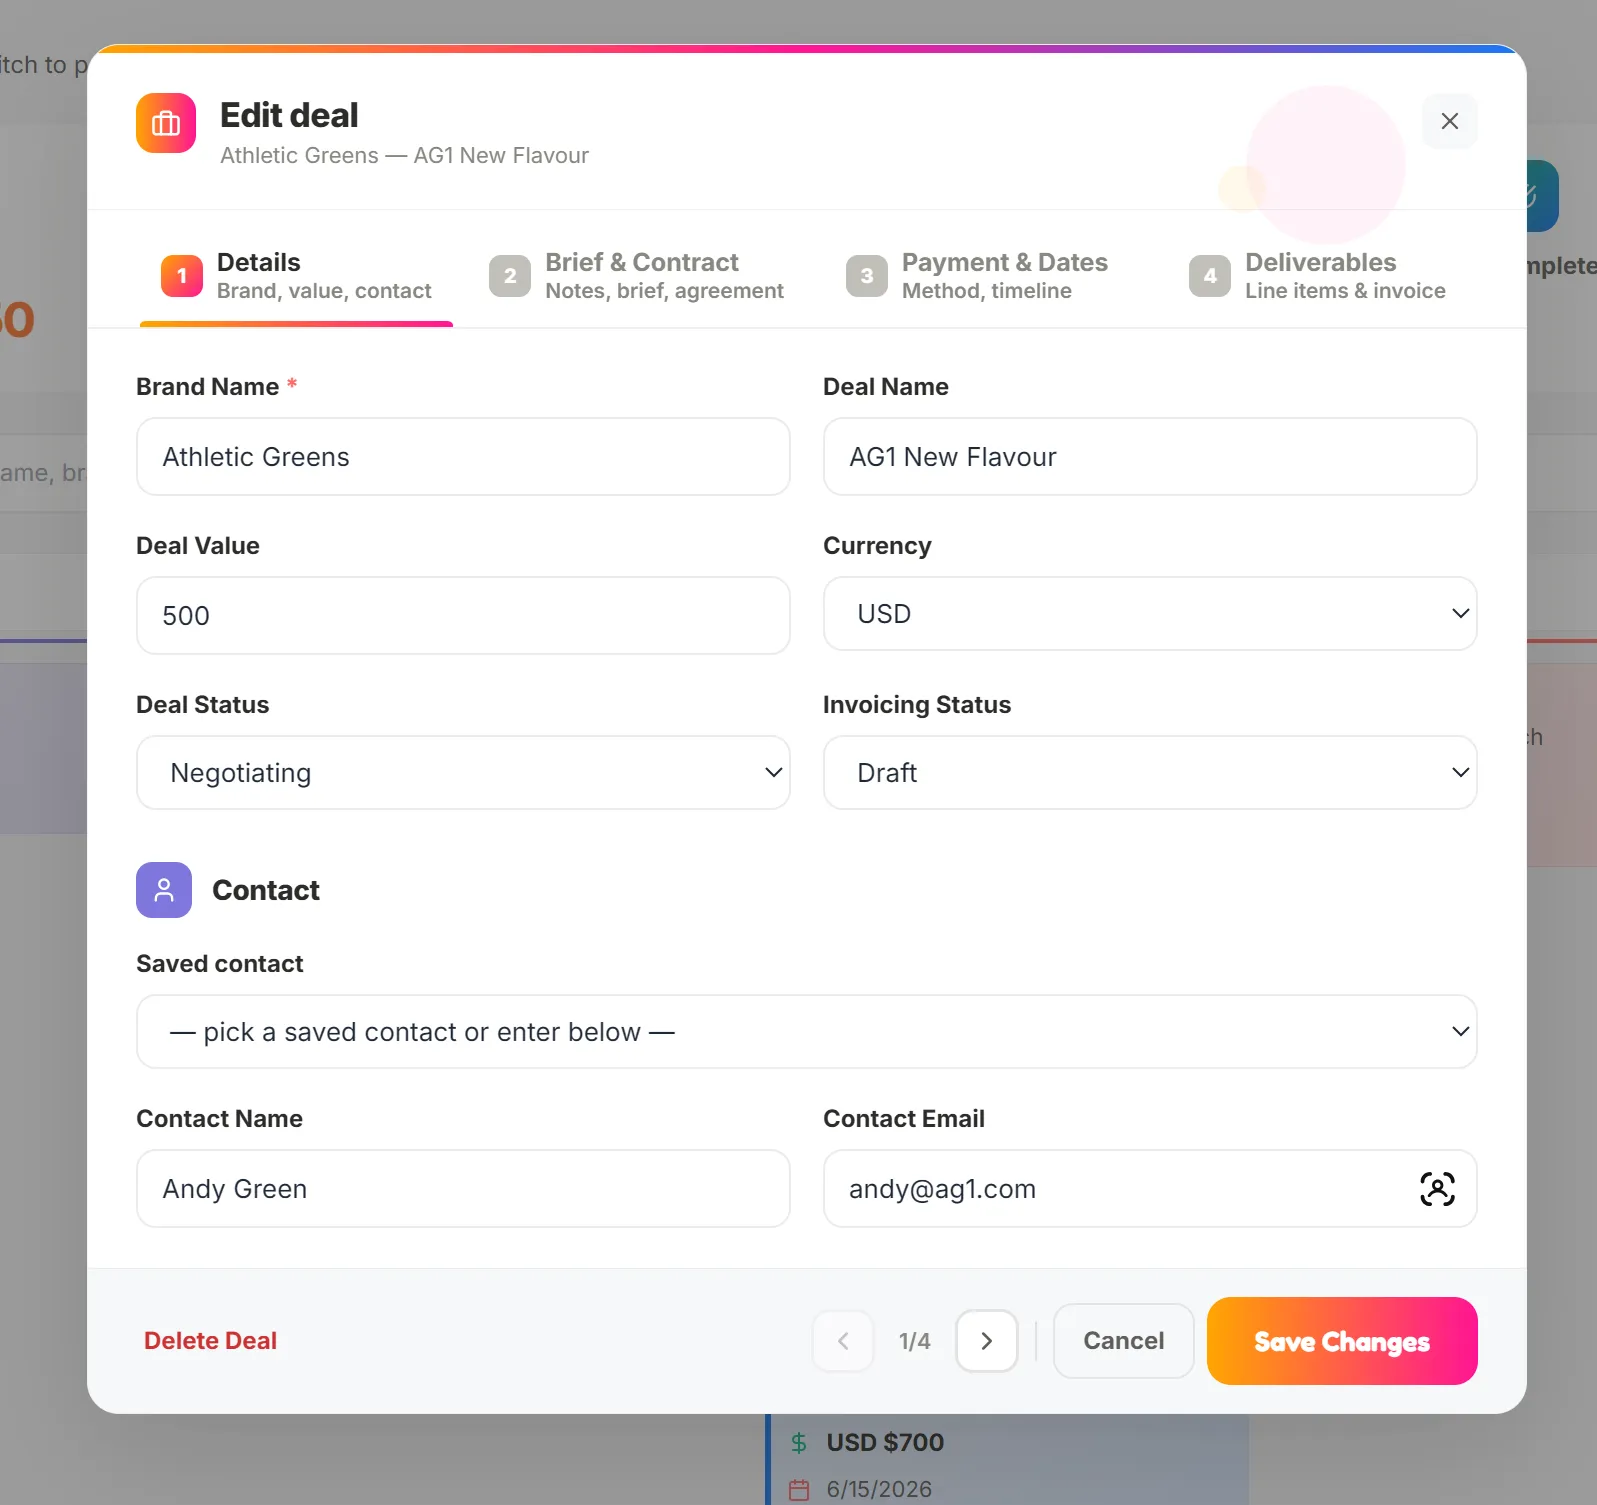
Once the deal is created, you can open it to edit, add more details and start your quote.
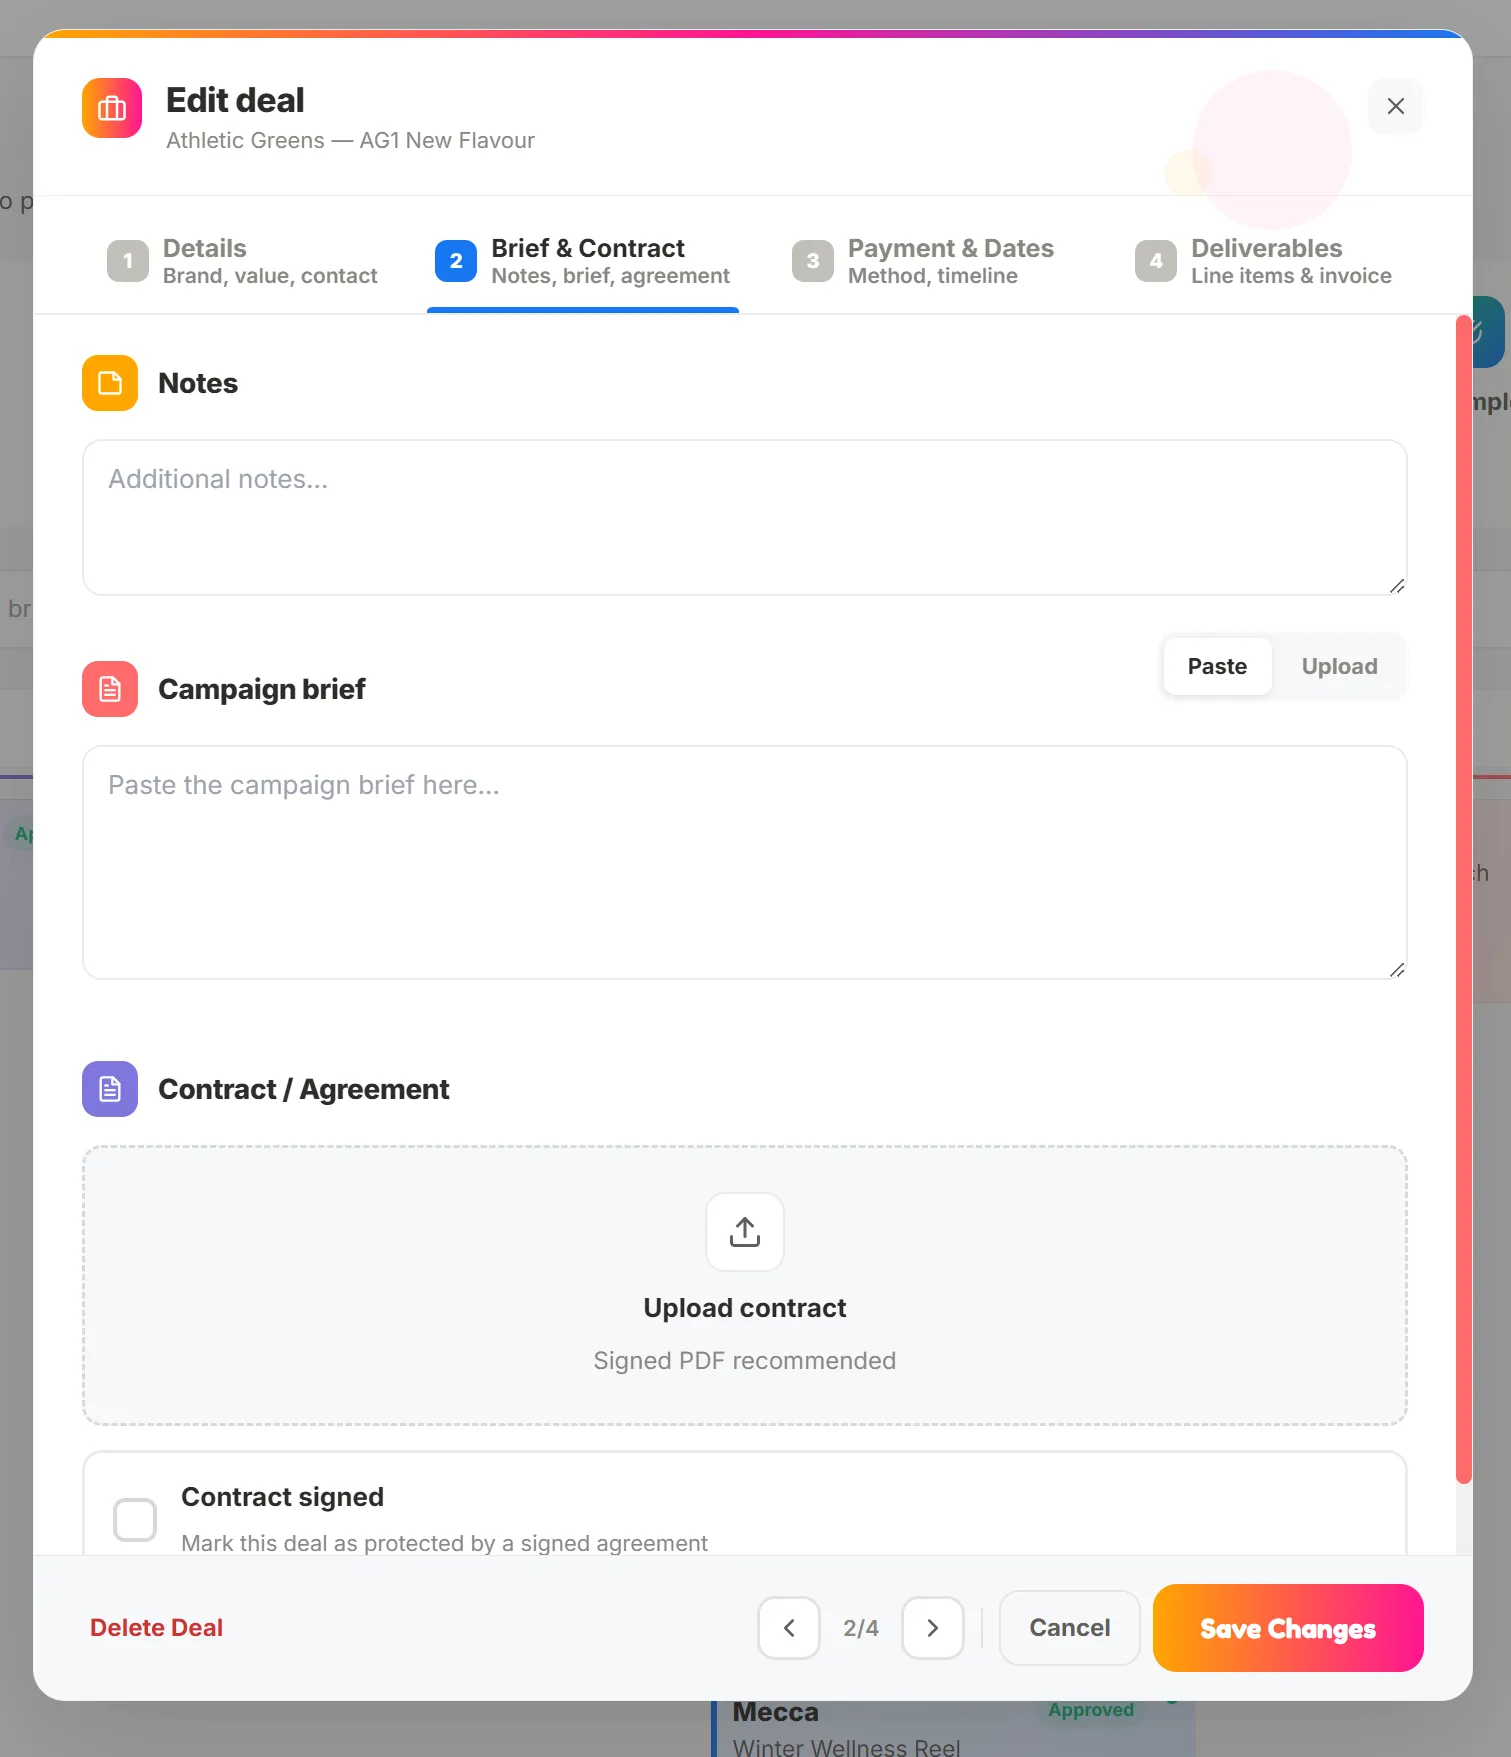
In Step 2, you can add notes, paste or upload the brief from the client, and add your contract or agreement documents. You can even mark it as signed so you know thats locked away!
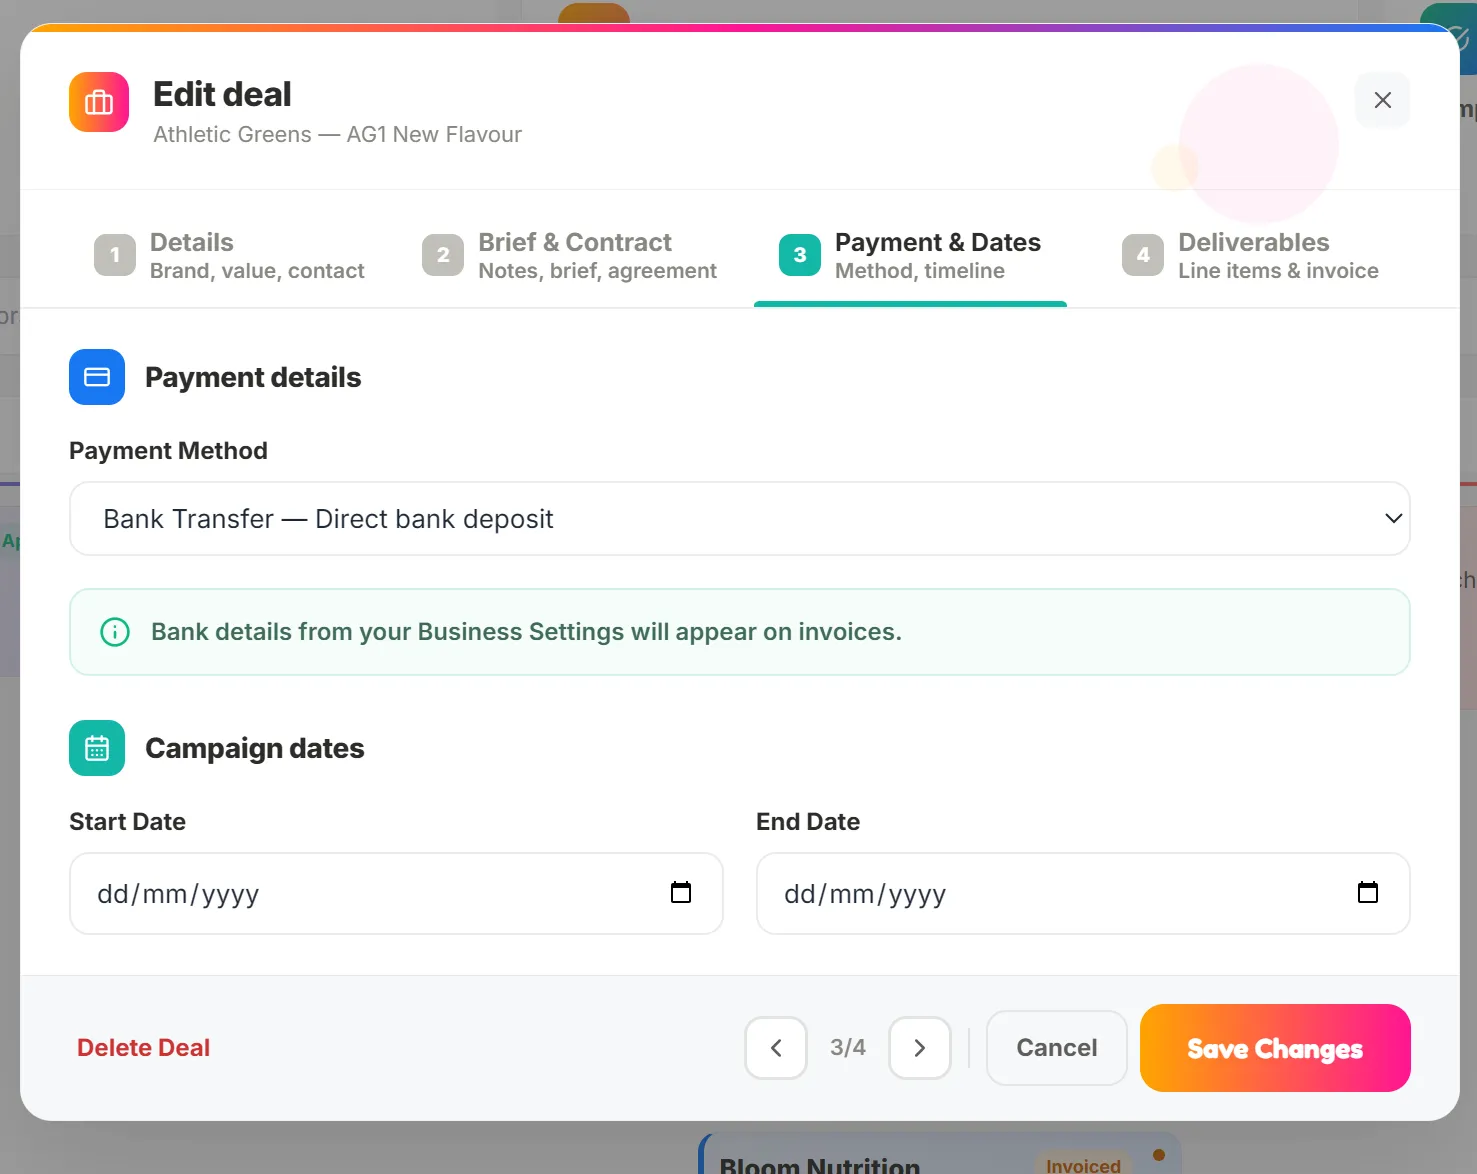
In Step 3, set payment details (direct deposit, PayPal, SWIFT transfer or a custom payment method) and update your campaign dates.
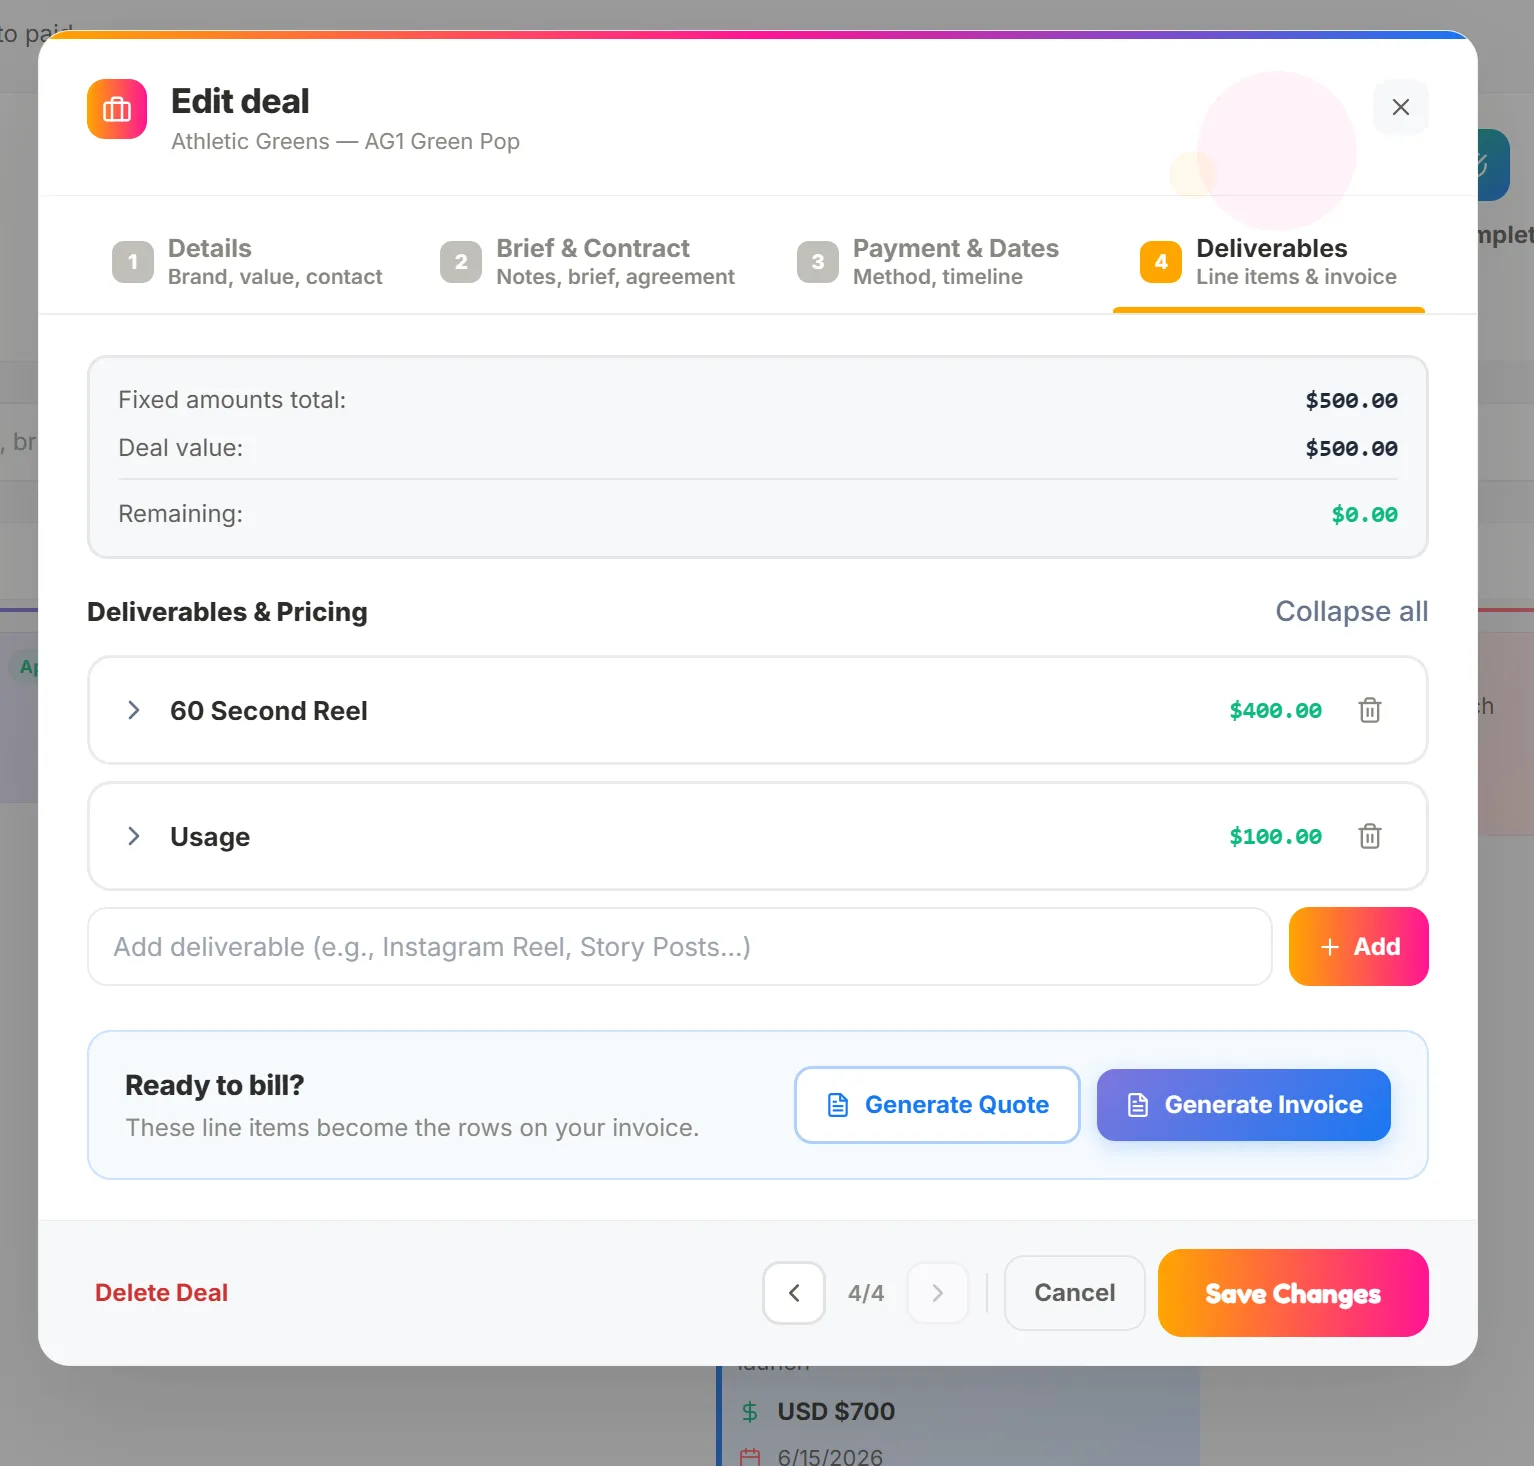
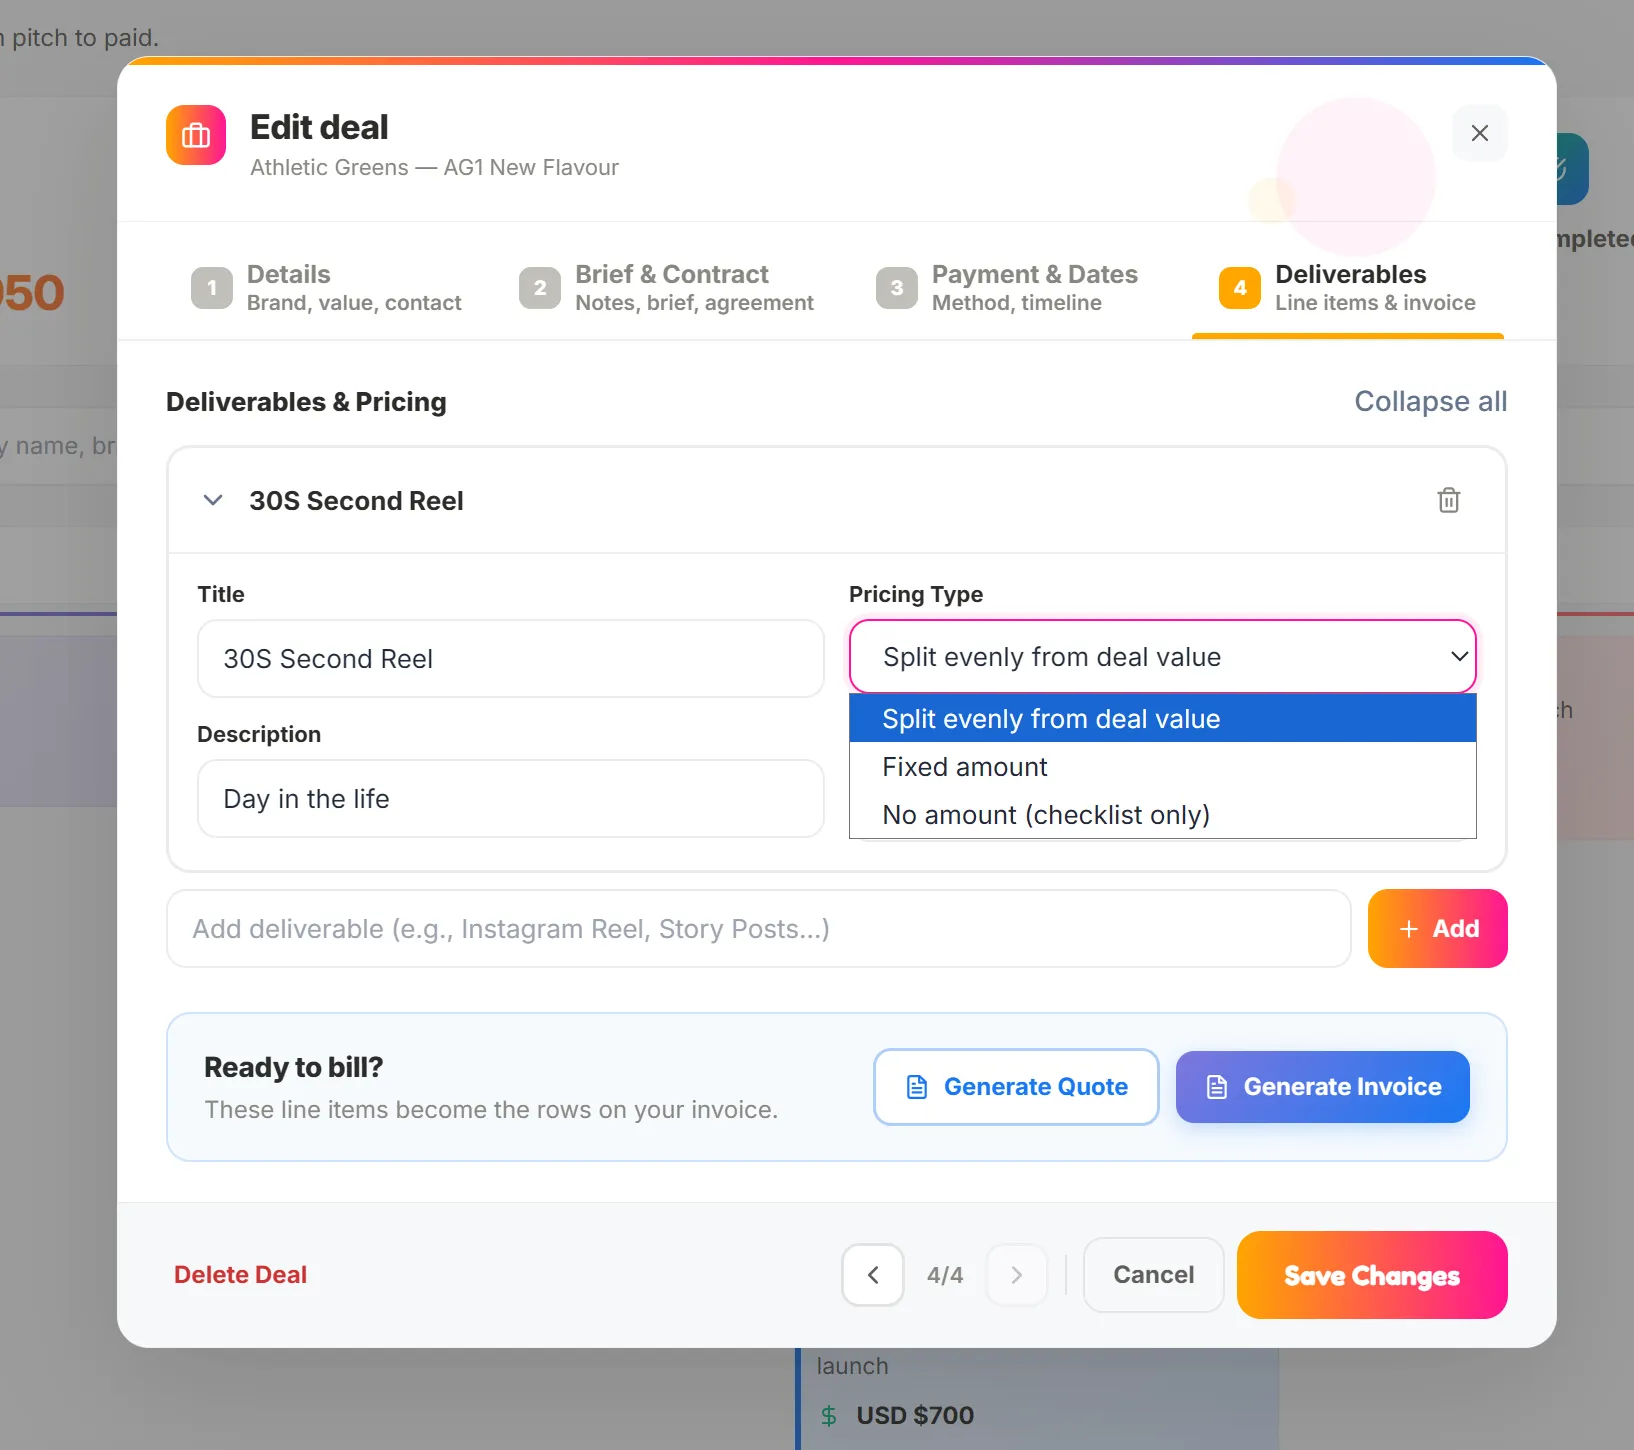
Finally in Step 4, you can add line items or deliverables to your quote/invoice and decide if you want to split the total cost evenly from the deal value, set a fixed amount, or use it as a checklist only with no assigned value.